Building Progressive Web Apps with Angular 11 Framework


We are focussing on step wise process to build progressive web app with Angular 11 here!
Progressive web applications are mobile applications that do not require installation and depict behaviour similar to websites. These even perform in the intermittent network.
Prerequisites: What we require to get through?
- Install node.js locally
- Get the latest version of Google Chrome Web Browser
- Install the Lighthouse Chrome Extension to later test if your app is progressive
- Get a Google Account for uploading the application to Firebase
Follow Steps in Sequence
- Create a new project with Angular CLI
- Angular generates test files in the process. Make use of the skip test flag to prevent these.
- As you get the prompt for configuration options, create a new project directory named ng-PWA.
- Navigate to the new directory.
- Create a web app manifest. It is a JSON file with a configuration that gives a web application the ability to save the user’s home screen. It defines the appearance and behaviour if launched from the home screen.
- Secure a manifest.json file in the root of the src folder nano src/manifest.json
- Now add this code in the src/manifest.json file:
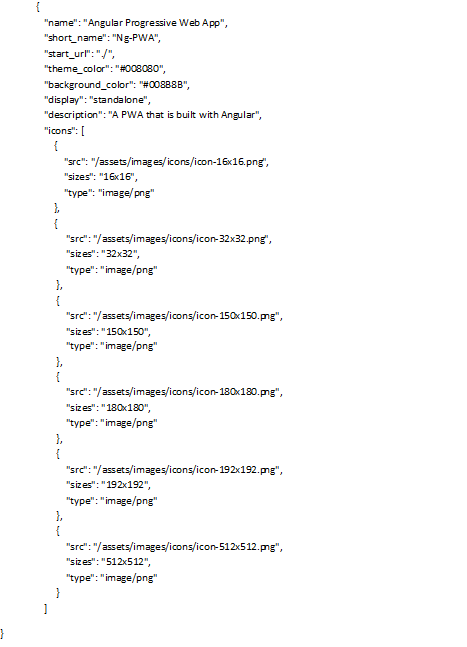
- Specify a name that you can attach with the app icon on the user’s home screen. It should be a short name.
- Specify the landing page of the app while launching it from the home screen.
- Set the theme colour for the browser UI to know when the users visit your website.
- Specify the background colour property controls to change the background on which the app icon displays when users launch the app from the home screen. You should specify when you wish to display or hide the browser UI.
- Create duplicates of the app icons in multiple dimensions if you want users with different types of devices with screen sizes to visit your site.
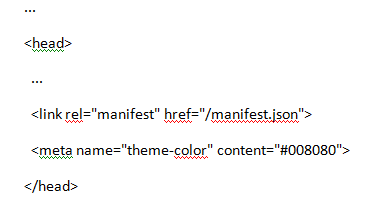
- Go to index.html and add some code to the head section (after adding the image assets)
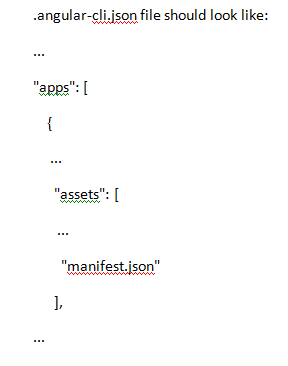
- Instruct Angular to add the web app manifest file to the build folder. Add manifest.json file to the assets array in the apps section of the .angular-cli.json file.
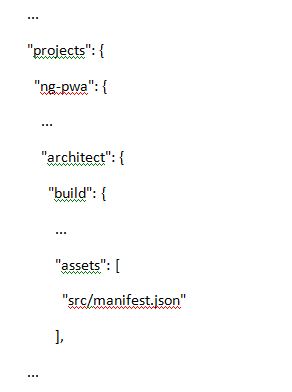
- Edit Angular.json instead of .angular-cli.json for applications built with Angular 6 or later. Add this code into angular.json:
- Add service workers – webpack to the app before pushing it into production with the help of the sw-precache-webpack-plugin npm package. It must be able to track and cache the build files.
- Execute a command to auto-generate the service worker in the build folder. For this, run the npm install command from the ng-PWA directory to install the package.
- Create a file named precache-config.js, after installing the package
- Add this code in the precache-config.js file:
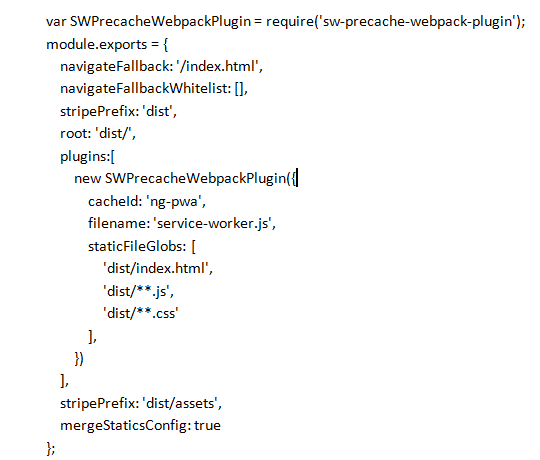
- The precache-config.js file configures the sw-precache-webpack-plugin by using literal object key-value pairs.
- Configure sw-precache-webpack-plugin
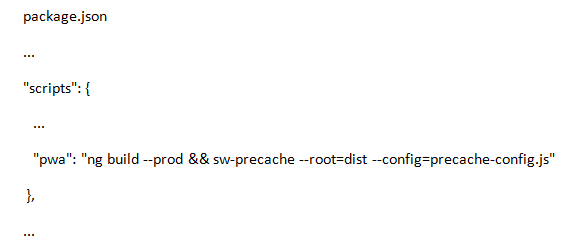
- Finish the service worker setup by creating a custom npm script or command that builds the app and auto-generate the service worker file in the build folder.
- Add this code into the package.json file:
Get ready to create the views after installing the sw-precache-webpack-plugin and creating precache-config.js and editing package.json.
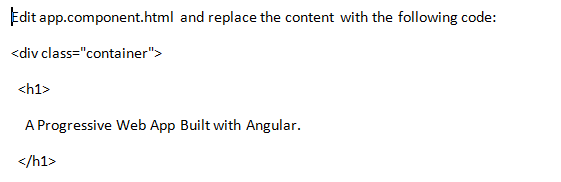
PWA with Angular commixes only a single view. Edit app.component.html and replace the content with some code that displays images, text and links.
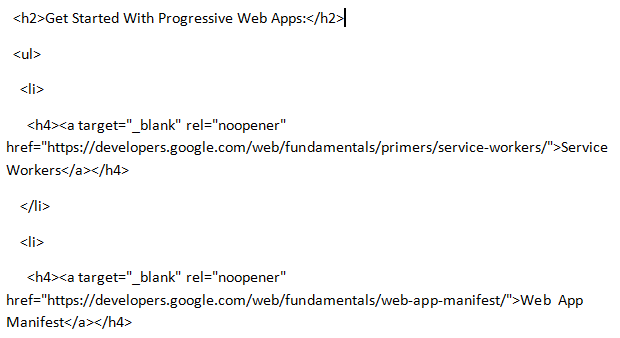
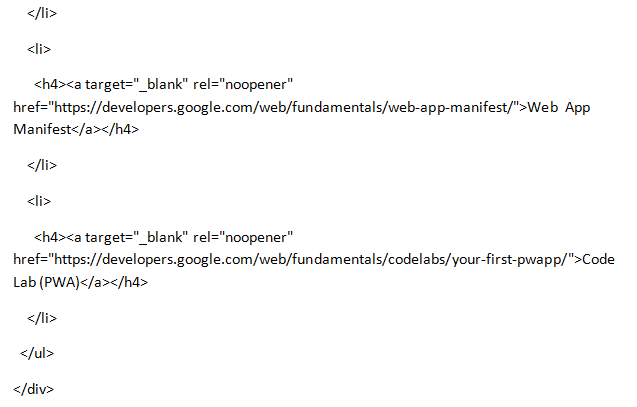
It will produce a web page with images, text, and links. Here the rel=”noopener” attribute is essential if the anchor element’s target attribute is set “to _blank” for security and performance reasons. Edit src/styles.css as follows:
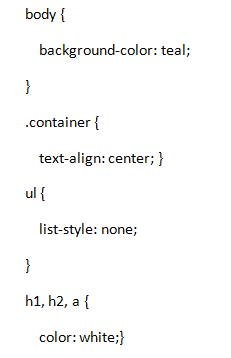
It will create a background in teal with text in white in the centre.
- It’s time to deploy your app. Service workers require a secure connection. Visit firebase.google.com. Create an account if you don’t have it already.
- Go to the Console link and create a new Firebase project.
- Click continue to arrive at the project dashboard.
Go back to the command terminal. Run the npm install command to install the firebase-tools package globally – npm install -g [email protected]
- After installation completes, build the app for deployment.
- Auto-generate service worker, run the following from the ng-PWA directory: npm run PWA
- As we run the custom script, this makes our app production-ready.
- Log in to ‘Firebase’ by running this command: “firebase login”;
- As you will be prompted for credentials, enter your account information into the terminal.
- Run “Firebase init” to initialize the Firebase project.
- Answer some questions:
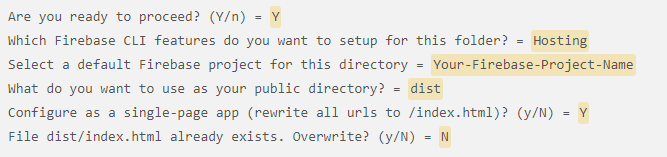
- Now the app is ready for deployment. Run the “firebase deploy” command and then run “firebase open hosting: website-name”;
- Troubleshoot and test with Lighthouse depending upon your configuration.
Conclusive: Where can we go from here?
We’ve discussed creating progressive web apps in Vue.js and Ionic earlier. We hope that this article brings insight and eases the transition. PWA’s are lightweight and bring native app-like features into the web platform. Connect with us for more details.