How to Convert an Objective-C App to Swift


What is more feasible – Migrating an existing code developed in Objective-C to Swift or Creating a completely new application into Swift? Migrating an existing code might cause some incompatibilities, but with the emergence of Swift, almost all iOS developers have shifted their focus to it.
What is Swift?
Swift is an object-oriented programming language by Apple. Just as the name says, it quickly overtook Objective C, the programming language which is being used to create iOS mobile applications and OSX. Swift as a smart programming language has enabled a level of interactivity in expansion and has delineated the understanding of mobile app development.
It has simplified the way mobile applications have been developed and proven out to be a very smooth programming language that will eventually help in developing a meaningful connection between brands, developers, and users. However, apart from this, there are a couple of features that make Swift stand out, such as generics, closures etc. that further simplifies the common patterns that are used in Objective-C and more.
According to the latest reports, it has been successful in securing its place in the top 10 programming languages along with its predecessor Objective-C. Various iPhone app development services gradually started with Objective-C development which soon transformed into Swift development later. Irrespective of their programming paradigms, Objective C, and Swift are extremely compatible.
You will have to invest a lot of time, money and efforts into migrating a fully functional Objective-C App to Swift. This approach can seem to be a bit exaggerated if you are looking to rewrite your code, but it’s worth trying with the rise of iOS development.
Writing a brand new code in Swift can be a good compromise of shifting platforms and yet keeping up with the latest technology advancements. This way you can do what is required, enjoy the best of platform advantages and yet do not have to invest a lot of time and money into it.
Why use Swift?
- Fast
- Safe
- Better productivity
- Progressive language
- Maintenance
- Swift is more readable
- Swift has less code
Step Wise Conversion Process
Let’s prepare our existing app for conversion
The idea is to start with the latest Objective-C Code. A converter will always be useful that will help you perform the following functions:
- The id must be changed to instance type wherever possible
- Appropriate enum macros must be used
- Upgrade it to @property syntax
As the converter helps in the analysis and application of potential changes, it is not able to check the semantics of the code. Everything must be manually checked and then changes must be confirmed.
In order to make use of the converter, the following steps must be taken: Edit -> Refactor -> Change to Modern Objective-C syntax.
How to go for Objective-C code to Swift Migration?
Pick one class at a time. Replace .m and .h files with a single .swift file. Xcode will automatically generate the header file if it is required.
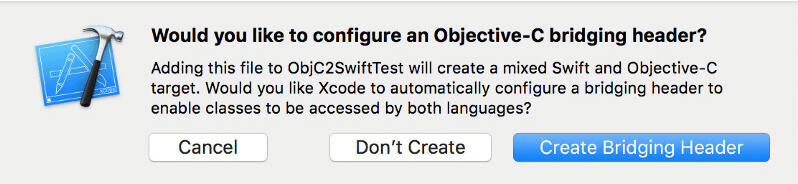
Designing a Bridging Header File
You will get a prompt as given below when you try to add your first .swift file:
A Step-By-Step Guide
- Select .m and .h files to be converted into Swift. AppDelegate class must not be touched if you wish to convert the entire project.
- Search for #import “MyViewController.h” in entire code and remove it from Objective-C Bridging Header File ([MyProject]-Bridging-Header.h).
- Change instances of #import “[filename].h” with #import “[MyProject]-Swift.h” in al .m files. In addition to this, replace @class [filename] instead of #import “[filename].h” in all .h files.
- ‘Swiftify for Xcode’ Finder extension must be used to transform the part of Objective-C to Swift. Copy the content of .m and .h files to .swift and apply the “Convert File to Swift” option in Swiftify Xcode Extension.
- Substitute .h and .m files with converted .swift files in the entire project.
- Compile the project and fix any errors if there. Xcode auto-fix Suggestions will automatically help in fixing most of the errors, on other ends, Swiftify can also be used to report and fix other errors that appear several times in the project.
- The Project is ready to be built and executed after all the compilation is successfully done. Try to find suitable references in the storyboard editor in case there are any issues of “Class not Found”. Enter the class name again in Identity Inspector and try again.
- AppDelegate class can be transformed in case you are to convert the entire project. Main.m and .pch files in a precompiled header can be deleted if no objective-c files are left in the target.
Also read: Swift vs Objective C: 5 Benefits of Swift Development
Thus, all that is required to convert an Objective C code into Swift is to add nullability information to the header to resolve the warnings issued by the compiler. Swift is no more a new language and is definitely going to help you with a cleaner architecture, easy code read and more productivity. Converting an Objective-C code into Swift and developing an iPhone app in Swift is not going to slow us down a bit.